
MTF Photos - Lighting & Backdrops for Transgender Women
Please do yourself a huge favor, girlfriend. Don't skip over this section. I say this because in my beginning? I would have. Adequate lighting is the difference between a good picture and those marginal shots.
Guess what?
I first assumed I didn't want too much lighting. You know - no reason to illuminate the many flaws. Strangely, lighting hides flaws - poor lighting illuminates them.
Go figure!
Adequate lighting - and quality settings - create killer photos.
Period.
Additional Chapters in This Section Include:
Crossdresser Photo Tips
MTF Photo Guide
Crossdressing Photo Hardware
MTF Photography Tips
Editing Your Crossdresser Photos
section overview
Here I'm going to show you how to:
- Create lighting that will enhance your photographs
- Use backdrops and find "settings" that will improve your pictures
- Add props that add meaning to certain pictures
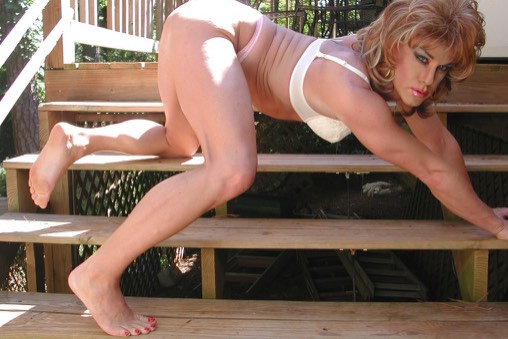
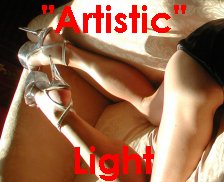
bad lighting
I really missed the boat early on when it came to shooting decent photos. Know why? I had a total misunderstanding regarding the the use of lighting.
The Common Misconception
My lighting misconception was born from my experience with nightclubbing. I always dreaded bright lights. I felt they illuminated all those minor (and major) femme flaws. Thus, it was only natural I'd assume that if I looked most feminine in a shadowy nightclub environments - it must be doubly true with photographs.
That - is wrong. Plain and simple - the key to great photographs is adequate lighting. Short of investing thousands of dollars in lighting systems and photograph training - I discovered a few low cost methods to dramatically improve the quality of your pictures - through lighting.
Bad Lighting "Hides" Lovely Details
Ever noticed photos that are full of detail? Yes - the camera taking those photos makes a difference in the amount of vivid detail included with the photograph. However, the camera is only half the deal. The rest of detail - or lack thereof - is from light.
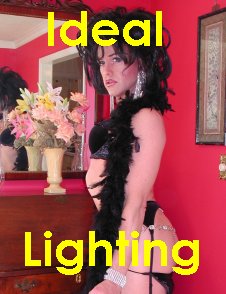
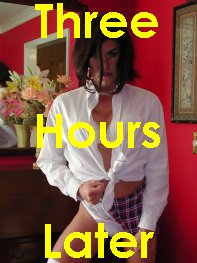
Notice the example photos I've included from my living room. These photos were taken exactly three hours apart from one another - in the same spot in my living room. The difference? The sun that was beaming so brightly through my front window in the first photo - had since moved over my home - and off towards Asia - in the second. Try as I may - there's simply no way I can subsequently adjust the second photo to look anywhere near as good as the first. The details - are missing.
Bad lighting will make you look tired & ragged. Good lighting - will cause you to appear vibrant and beautiful. Which one would you prefer? That's what I thought...((hugs))
natural lighting
By far - the very best lighting - is natural lighting. It's now pretty much the only light I use for shooting photos.
I recognize many beginning t-girls will never get the opportunity to use natural light. Most are forced to take pictures at late hours when nobody else is around to discover their little secret. However - if you can - try to plan time to take some pictures when the sun is up.
Natural lighting is easiest on a cloudy day. Direct sunlight is the trickiest to learn how to create good photos. The subsequent shadows it causes - can be brutal on your features. If you're taking photos at high noon - try and find a shaded spot. One trick I almost always use - is I set my camera to force the flash - regardless if my auto adjust says I need light or not. Again, the reason for this procedure is it brings out the best details. If I end up with too much light - I can subsequently darken a picture with my graphics program. However, those where I don't force the flash - are often a bit too dark and less vivid - to be favorites. This feature requires you read the directions that came with your camera. I know how much you all hate doing that - but trust me - for this one feature - it's worth the humility. ((hugs))
Another great thing about natural lighting is that it can create some killer artistic-styled photos - even when you don't plan them. See a split in the sunlight entering a room? Try playing with it a bit. It's tricky - as it often causes shadows to appear every place but where you want them. However - on occasion - it'll result in some breathtaking pictures to include in your personal portfolio of female expression.
"artificial" lighting
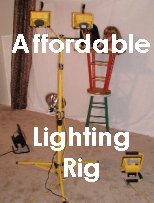
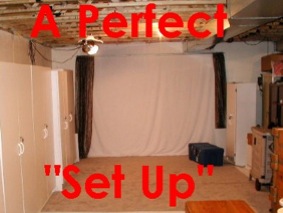
Can't take pictures during the day? Don't feel bad - most gals can't. I never had much luck taking photos at night - until my dear friend Lady Ashely shared her low-cost trick for late-night lighting. If you'll visit a Home Depot - you'll discover halogen work lights you can purchase for as little as ten dollars. The large rig"- (including in the sample photos) - comes complete with its own stand, two lamps and bulbs - and costs around $40.00.
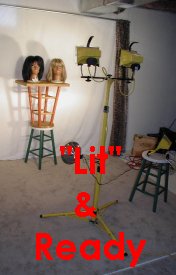
These lights create powerful low cost photographic lighting. Ashe has a perfect set up in the basement of her home for such shoots - complete with back drop, side lights - even ceiling lamps. While I pray none of you ever become as obsessive compulsive in your studio - as my dear Yankee sister - I suspect you might take a usable idea or two from her gear. Alas, even a rat gets lucky and finds some cheese now & then...and that pesky little rodent Ashe - scores high on our affordable lighting method. *Grin* I tend to be a bit lazier - pulling only the large rig for night photos.
An important point to her methodology is to situate the camera & stand in front of the lights - versus behind them. The latter tends to create orange colored pictures that I consider worthless - except for conversion to black & white images. Don't forget to set the camera in place before you flip on the bulbs. These lights are very, very hot. They're also very bright. The first time I did this - upon Ashe's recommendation...I melted the edge of a favorite wig - was sweating like a bitch in heat - and was temporarily blinded after looking directly into the bulbs - from trying to turn on my damn camera! At this point, I was positively certain my friend had set me up with the whole concept - as a practical joke. *Laugh*
Alas, once I got the hang of it - I found it made for great picture lighting. I've heard you can add colored bulbs to the "sides" (blue, red, yellow, etc) - to create alternative color imaging. I've never tried this - but other gals swear by such accouterments.
Backdrops & Settings
You look fabulous! Your "make up" is perfect. Your outfit is breathtaking. How might you look even better?
Simple.
Find the perfect backdrop to surround your photographs.
backdrops & furnishings
Most beginners are elated to simply shoot a few lovely photos of themselves dressed as a woman. Anything beyond that - seems like icing. Well - the difference between your good - and great pictures - will usually be in that icing. *Smile*
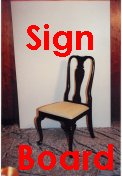
Sign Boards
For simplicity's sake, I often use a sign board for shooting my pictures. You can purchase them from any sign shop. They are usually constructed with white on one side & black - on the other. That's a nice bonus - you get two highly distinctive colors from the onset. You can also tack up cloth
backdrops to add a rainbow of different colors. They come in heavy duty wood and foam. I purchased the wood version for longevity purposes but the foam ones are pretty sturdy. What can I say - I prefer the hard ones...*Laugh*
Furniture & Walls
A chair or sofa offers a number of great possibilities for better photos. If your furnishings feel dated or a bit ragged - drape a white bedding sheet over top of it. Consider crawling all over the pieces - if for no other reason than it's fun to be childish. *Laugh* Seriously, try leveraging yourself against stationary objects to create better angles - and poses.
Hotel Rooms
If you're going to shoot your pictures in a private hotel room, take note of a few spots around the room that might make for lovely photos. There're usually at least four decent locations in any basic hotel room - the bed, in front of the curtains, a plain wall, and at the mirror - where you get ready.
Note each of these locations before you begin your transformation. Make sure you don't clutter them up to much a you assemble yourself. It's much easier to move furniture in tennis shoes - than high heels. *Smile*

Lighting is usually very limited in these rooms - they like saving on the energy bills. Check how you might move some furnishings around. Check if any light bulbs are not working and attend to this with the front desk before you start getting ready. (Voice of experience...*laugh*) If you're extra-dedicated to shooting good photos - bring one of those portable halogen work lights with 'ya on the journey.
Sadly, most hotel bedding colors are not complimentary to photograph - and will detract from your pictures. I'd consider removing their spreads - in favor of a simple sheet for bed pictures. You want to record you & your ensemble - not some orange-mixed, 1970's, Holiday Inn Decorators idea of a Comforter. *Laugh*
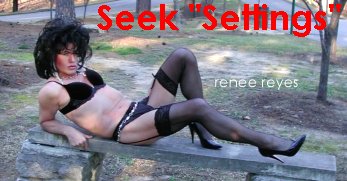
backdrops
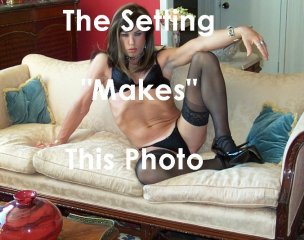
Some gals are very concerned about anyone "seeing" the contents of their home in a photograph. A plain cloth backdrop alleviates this concern over indiscretion - and creates a nice clean "setting".
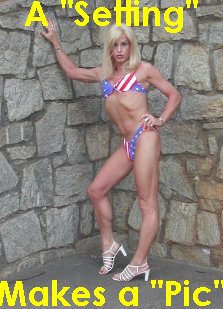
"Backdrops" can make a huge statement in the message conveyed from your photograph. Frankly, they often "make" the photo. A backdrop keeps the observer's eyes focused on "you" in the photo. I started off going to Home Depot and getting a white "painting" drop cloth, which I used as my backdrop.
Another potential benefit of a plain backdrop is there is nothing to "scale" your size. Thus, in such a photo, you can look 5'6 - and actually stand 6'5. It is also possible to further reduce your size by "positioning" your body differently. (i.e. bend down, curl up, etc.)
Adding Variety
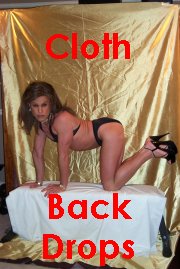
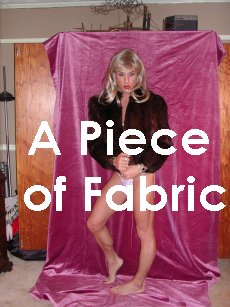
Subsequent to using my painting drop cloth - I visited a fabric store and purchased velvet bolts in a variety of colors. I tried other fabrics. However, I found velvet offered the ideal weight and depth of coloring to enhance the look I was after.
I buy eight foot fabric sections of different colors and mount them with tacks behind me. You can also use silver headed push pins - for improved ease in mounting on certain backings. You needn't get concerned with all the other stuff that will show up in the background. You can cut all that out with a graphics program.
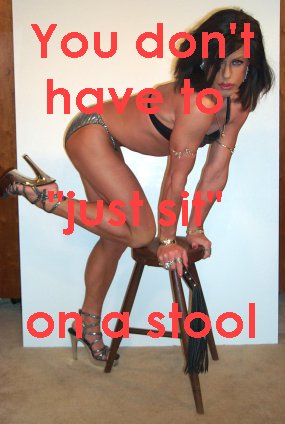
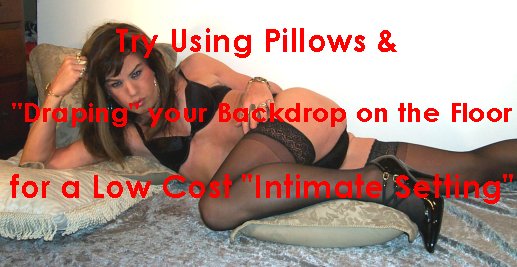
As a cheap & easy intimate setting - I'll lay my sign board on its side, throw a velvet back drop on the floor - sprinkle some pillows in the mix - and just sort of throw myself in the middle of this whole mess. *Grin* You'd be amazed how effectively and cheaply you can create unique and alternative settings - with a touch of creative thought. *Smile*
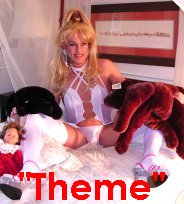
props

Backdrops can offer the ideal setting for your photographs - but props can make a huge statement.The first prop you'll likely be in search of is a place to adorn your body - i.e.. chair, bed, etc. You can also drape a bench with a sheet for an elegant appearance. I often cover my exercise bench for photos. It works great - and looks just right. If you're having trouble figuring out exactly what to do with your hands in a photograph - you might consider putting something in them. Props can add a great deal to any photograph.
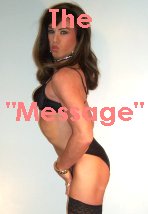
They can convey a particular message - even change the message through conflict.
One mistake I made early on with hand held props - was that I often over-dramatized the prop in my photographs. For optimal effect - just include the prop casually - it's there for effect - you - are the subject of the photograph.
You need not invest in expensive or unique props for your photographs. A quick walk around any room will unearth a myriad of photographic accessory options. Some of my favorites, include:
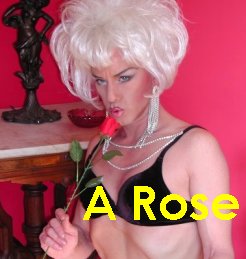
- A flower
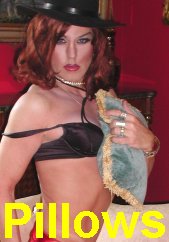
- A pillow
- A pencil
- A candle
- A wine glass / bottle
- A stuffed animal
- A large book
- A mirror
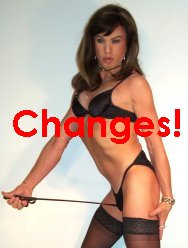
- A whip
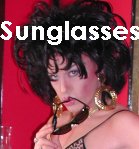
- A pair of sunglasses
- Loose clothing I just removed
Look around - you'll find all sorts of statements to add to your photographs. Likewise, try positioning the prop in a variety of locations. Hold it to your chest, slide it across your lips, bend down to pick it up, etc. Try interacting with a prop - and send a message - in that process. For instance - write a letter...blow out a candle...pour a glass of wine - or toast with it. If you really want to get into the prop thing - bring a bunch of these elements together at once! *Smile*
Props are just that - accessories. They're in the picture to add something to your image. Most often - they add a bit of variety to your other similar photos. You can enhance this variety by using them in more than one way.
Of course, fetish type props (whips, riding crops, handcuffs, etc.) can add a powerful statement to compliment your special theme"outfits. I find it clever at times to include such props in photographs & settings where it wouldn't otherwise seem likely. This is called sending conflicting messages. A 1950's secretary look - holding a riding crop - can jolt the senses and stimulate a compelling picture. Likewise, a dominatrix holding a dainty flower or fragile doll creates a similar effect. Try - thinking outside the box - now & then. It's supposed to be fun - so don't be afraid of doing a little of the F word. *Smile*
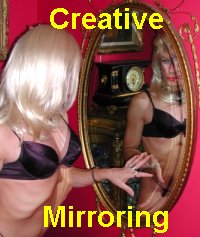
Likewise - your own clothing offers a prop you can use. Try pulling open the front of a jacket as you shoot. If you removed a jacket in a series of shots - consider still holding it in subsequent photographs. A mirror can offer one of the most useful props. The additional imagery they create by taking the photograph from an angle creates a voyeurs delight - and a touch of artistry. Minor props can add a lot to any photograph. Consider the theme of your ensemble - or the message you might like to try delivering with your photo.

Look around your house for supporting cast members - and enjoy the process of creating your very own little play. ((hugs))
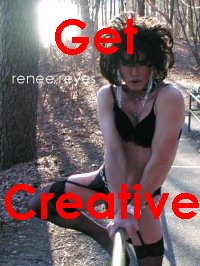
creative settings
If you're a bit more bold - you might want to shoot photos that include lovely areas of your home or hotel as setting for your photographs. Most married t-girls get warned (okay - threatened) by their wives not to dare include any photos on a web site that include even an inkling of their home.
Still, you might find a few unique spots that offer a cool environment - without giving up the address For instance? Try your bathroom...look inside a walk-in closet...scan the garage for locations...chic photo settings - are where you find them. Think creatively - and you'll add a great deal of pizzazz to your pictures - at no additional cost.
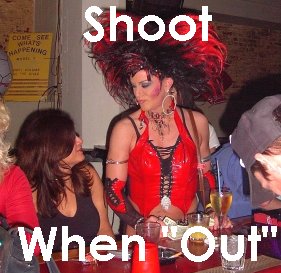
Certainly some of your favorite photos will be taken if & when you're able to go out with friends at various t-girl gatherings - or your own private adventures. Some bars won't allow you to take photos on the premises - others could care less.
Some gals go to great lengths organizing entire theme photos - including complimentary costuming, props, hair and settings. This can be fun and create great pictures if you have that just right place to do so.
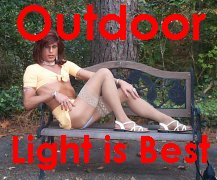
Outdoor photos are my personal favorite for a couple of reasons. First - I get the natural light - which almost always equates to my best pictures. Second, they add props you'd never find otherwise.
Don't know where to shoot some good photos? Try driving around and looking for spots - in guy mode.
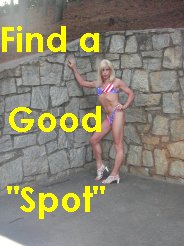
The brick wall included in a number of my pictures - is nothing more than a retaining wall in a parking lot at a small office park near my home. I sometimes stop there on my way home from clubbing all evening early Sunday mornings. Nobody is ever around. I simply pull my car up & block off the corner - set the camera on my hood - and snap a few pictures. I've found other secluded spots along my way. The time of day when you shoot these pictures can have a big impact on your degree of privacy.
Safety & Daring
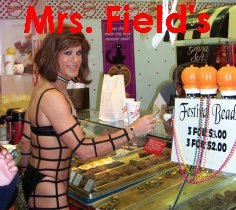
I'm not exactly the world's most shy tranny. Yes - I know many of you are shocked over this confession - but it's true. *Grin* I've taken half-clothed photos in every place from a Mrs. Field's Cookies to a phone booth"- and I've never faced issues.
Why not?
In each instance - it was appropriate for me to be dressed as I was. For example - in the Mrs. Field's photos - I was at a block party on Santa Monica Boulevard during Halloween. Trust me - I wasn't the wildest dressed patron on the premises. Likewise - dressing to sizzle in New Orleans during Mardi Grai"is a way of life - it's even appreciated.
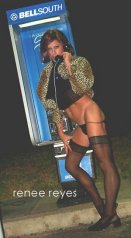
My photo booth pictures were taken at 3:00AM. I quickly stripped my skirt - and put it right back on - after the camera clicked.
I remain most concerned regarding my personal safety and infringing upon the individual freedoms of other people - no matter where I'm going or what I'm doing. Wearing wild costuming is appropriate in certain environments - horrific in others.
One of my favorite shoots was taken at Stone Mountain State Park in Atlanta on an early Sunday morning. A dear friend went with me to shoot these. Even though we drove to a remote location - we still encountered a dog walker as we were finishing the shooting of these pictures. That - meant it was time to go. I believe if my personal freedoms infringe on another - then I'm in the wrong. Granted - if I'd not been stripping down to my lingerie in these photos - I wouldn't have felt compelled to leave. Appropriate attire - in appropriate settings - is the key.
Consider your safety and the rights of others before getting too public with creative photography. Alas, I'm still trying to find the perfect spot to shoot great photos. Know what else? I hope I never find it...((hugs))